Sorry- I changed the columns to text going across the page as you had unrelated bits of info next to each other and it was confusing. Also make sure that the text is not too small and it is always the same size. (apart from titles)
The Darkroom.
|
A dark room is a room that is only exposed to red light and not white light. This is done as white light would compromise the development of the photograms and red light is used as a replacement as it does not react with the silver nitrate on the photograms.
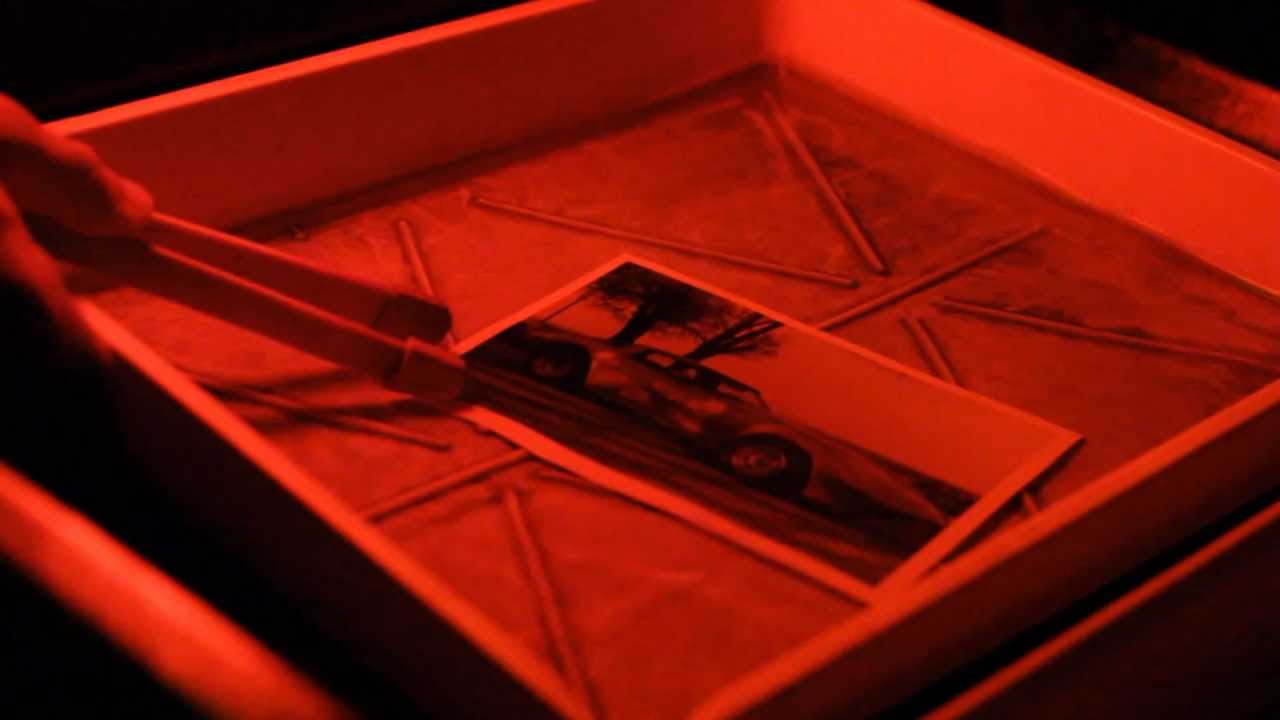
In the darkroom there are several enlargers (devices for producing photographic prints) set up as well as a station of darkroom trays containing three separate substances; the developer, the stop bath and the fix. The whole room is lit by a safe red light to prevent white light from reaching the photographic paper and ruining the process of the photogram. You leave the photographic paper in the: •Developer for 2 mins •Stop bath for 30 seconds •Fix- You have to test the fix to see how long you need to leave it in for |
|
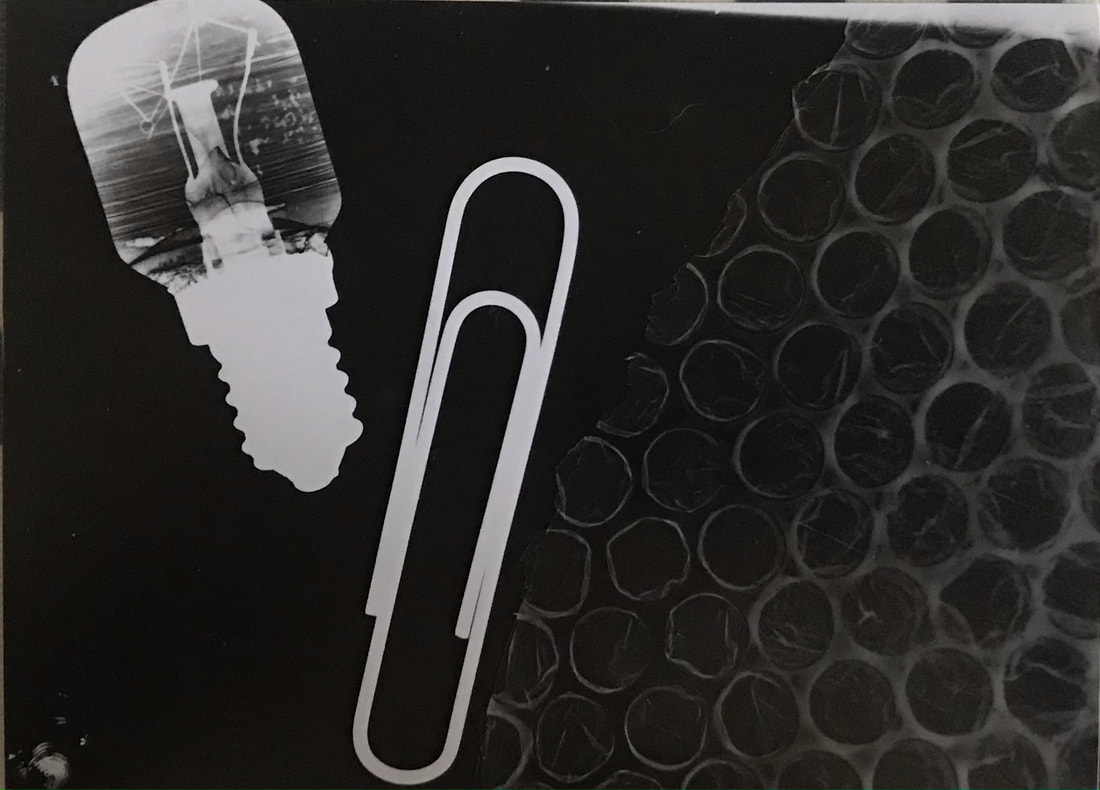
What is a photogram?
A photogram is a photo without negatives. It’s made without a camera where objects are places directly onto light sensitive paper and then exposed to light in a darkroom. The result is a white space where the object was placed where light couldn't reach the paper and react with the silver nitrate and the rest of the exposed paper is left as a dark shadow and turns black.
Man Ray 1890-1976
|
Man Ray was best known for his pioneering photography and his work with photograms. His experiments with photography included rediscovering how to take camera-less pictures. He made them by placing objects directly on light-sensitive paper, which he exposed to light and developed. Man Ray also experimented with the technique called solarisation, which renders part of a photographic image negative and part positive by exposing a print or negative to a flash of light during development.
|


How do you create a test strip?
|
A test strip is a series of exposures on a single piece of paper that is made to test the amount of light required for a particular negative. It is important to create a test strip so that you know what aperture you need to have on your enlarger and how long you should put on the exposure timer to create the best image.
•To create a test strip, you will need your photographic paper and a piece of black card that's bigger than the test paper. You must then hold it above the paper so that it prevents any light reaching the paper when the enlarger is switched on. •Switch the enlarger on and move the card to reveal a strip about one fifth of the area of the paper. Hold steady for three seconds and move the card to reveal another fifth of the paper and hold for three seconds. The first strip has now received six seconds. •Repeat this process exposing for three seconds each time you move across the remaining three parts of the paper. The part that was first exposed will now have had a total of 15 seconds exposure and gradually steps down to the last exposed strip with just a three seconds exposure. After, you develop your test strip in the processing trays as you normally would and let it dry before identifying which time would be ideal for creating the best photogram. |
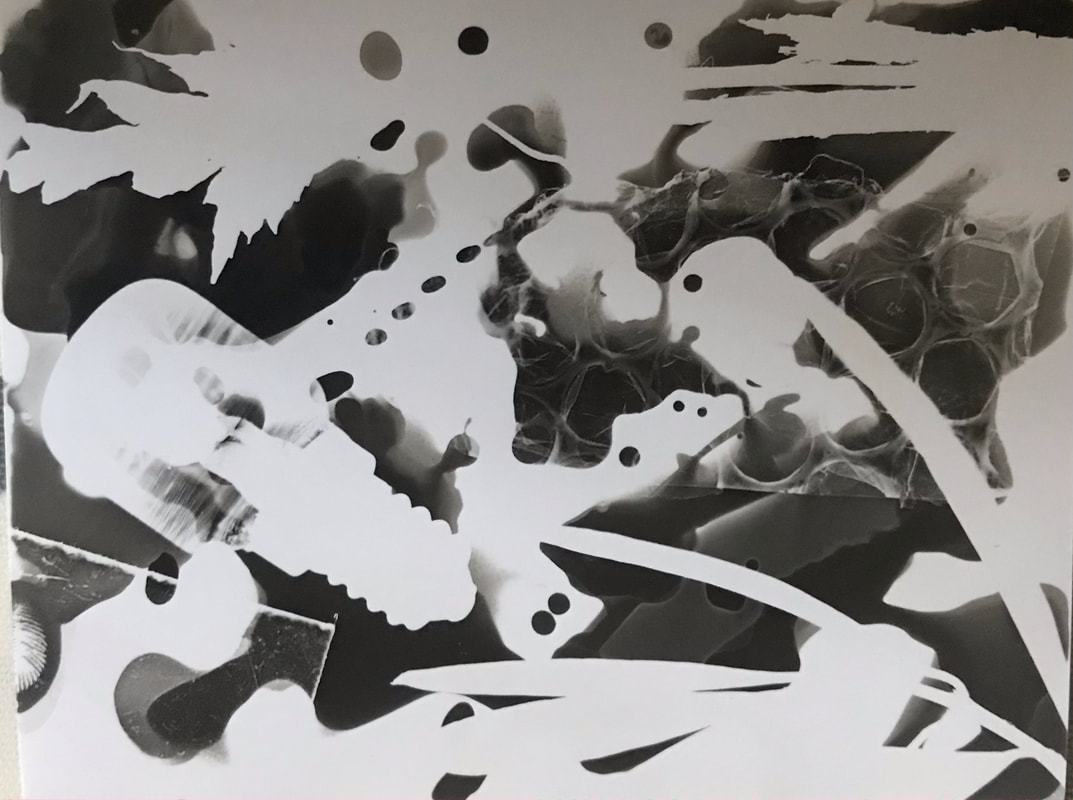
Painting with developer.Painting with developer is a technique that is used to create a liquid, painting-like effect on your photogram. This is done by using a paint brush to paint on the developer meaning that only some parts of your photogram will develop in a liquid like pattern.
To create this effect on a photogram you must: •Place your photographic paper underneath the enlarger with the safety light on. •Then, position your objects on top of the photographic paper. •Remove the safety lens before turning the exposure timer on. •Once you have created your undeveloped photogram, you then use a paintbrush dipped in the developer substance and drizzle, drip and paint the developer onto the photographic paper. •After you have created your desired design, you place your paper into the stop bath for 30 seconds before placing it in the fix solution. •Rinse, and let it dry, revealing your painted pattern. 
Solarising.Solarising is a technique used to create the effect of tone reversal by re-exposing your images after you begin developing.
To create this effect on a photogram you must: •Place your photographic paper underneath the enlarger with the safety light on. •Then, position your objects on top of the photographic paper. •Remove the safety lens before turning the exposure timer on. •After, you place your photogram in the developer and when the image begins to appear, remove the print from the developer. •Re-expose your image under the enlarger once again. •Develop your photogram. •Rinse, and let it dry, and you should see a lighter edge around the objects you printed. |
Double exposure.Double exposure is where you're left with the effect of a double image with objects overlapping one another. You lessen the time of exposure with each of the objects to make sure that they don't fully expose and create a less harsh image so that you can clearly see the two separate exposures.
To create this effect on a photogram you must: •Place your photographic paper underneath the enlarger with the safety light on. •Then, position your objects on top of the photographic paper. •Remove the safety lens before turning the exposure timer on for half the regular time. •Reposition your images or place new ones on top and turn the timer on for the other half of the full time. •Develop your photogram. •Rinse, and let it dry, revealing your double image. 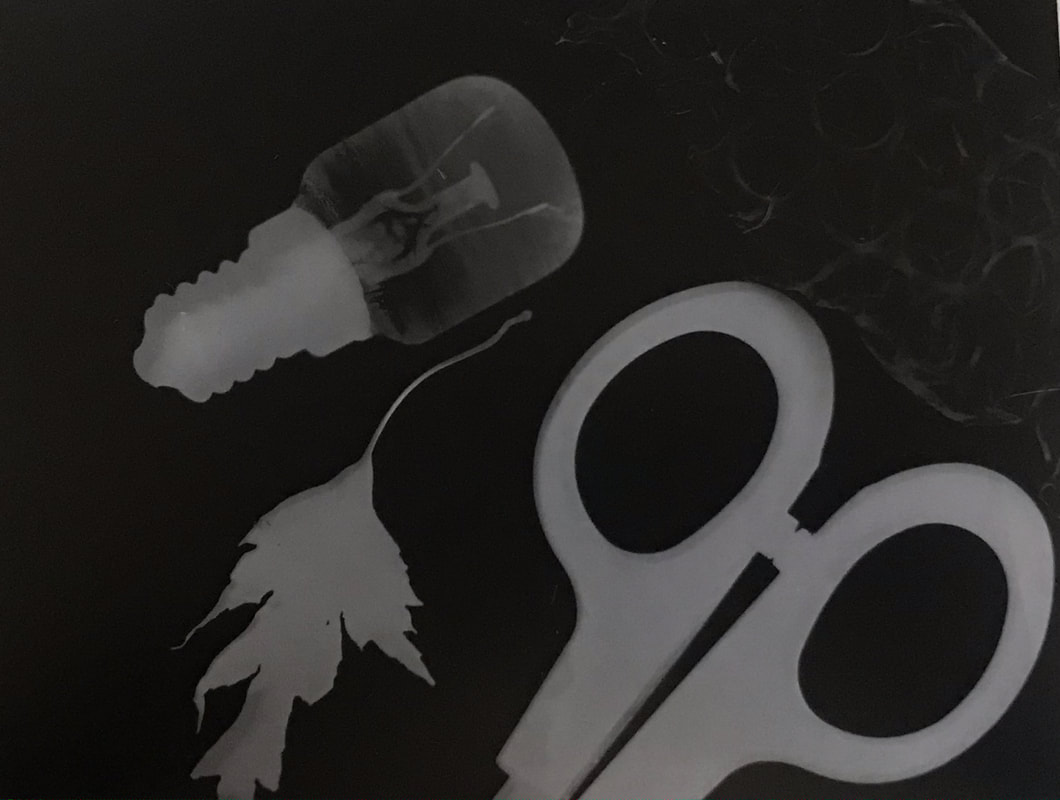
|
There are more techniques to explain- you should also use your own images to illustrate the techniques.
|
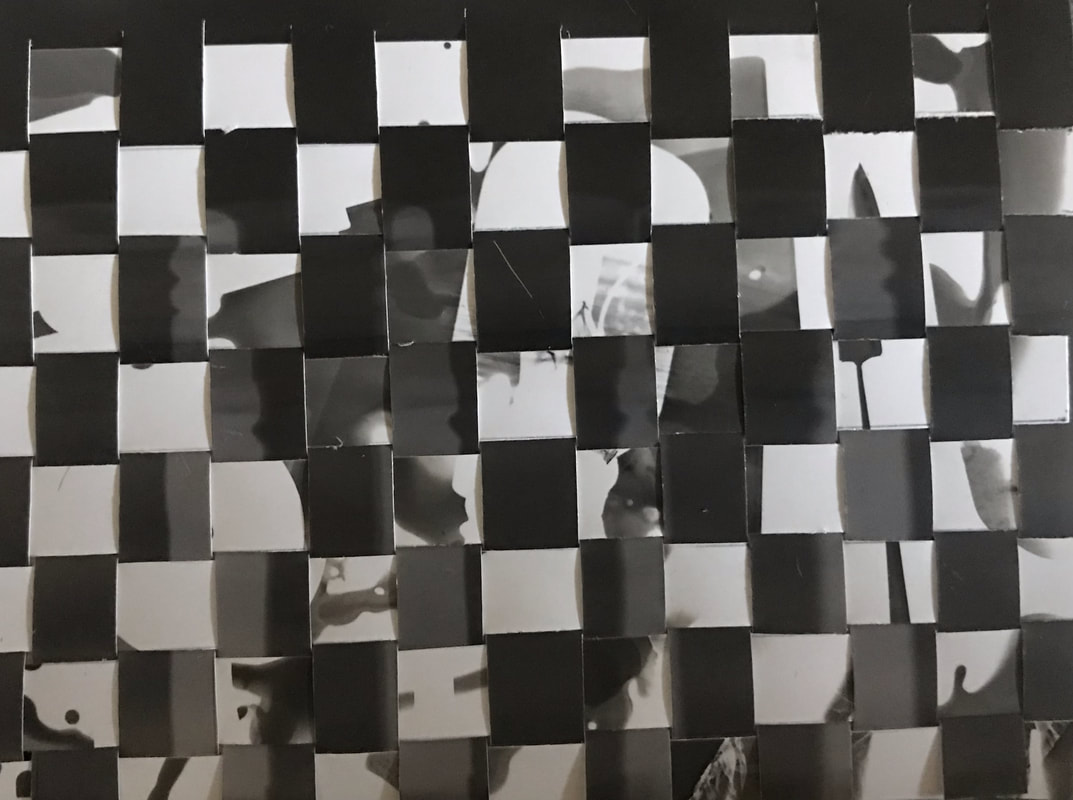
Weaving.Weaving is a technique created by cutting strips of two different photograms and weaving them together to create one chequered photogram. The key is to get two different toned photograms to create more of a contrast between the two and make the chequered pattern stand put more.
To create this you must: • Measure and cut 1cm strips along the length of one pf your chosen photograms •Then, measure and cut 1cm strips down the width of your other chosen photogram. • After, you want to begin to weave your photograms together by getting one strip and threading it over and under the other strips. • Do this with all the strips. • Finally, tape together the back to ensure that they are intact and don't move. |
Sandwich print.A sandwich print is where you take a photogram you've already created and invert the colour using an enlarger. When film negatives are used, one image will appear in the shadows of the other image. When creating a sandwich print, this effect is reversed to see the shadows of the actual objects placed there initially.
To create this effect, you must: •Place your photographic underneath the enlarger with the safety light on. •Then, take your photogram that you want to reverse, and place that directly on top of your photographic paper. •To ensure that your photogram is directly on top of the photographic paper, you need to place a glass slab on top to press the together. • Develop your photo as normal and you should be left with a photogram with inverted colours. 
|

Evaluation.This project allowed us to gain an understanding of the enlarger and become familiar with it and the different parts of it. It also showed us different ways of printing and different and new techniques. I found my most successful print was the double exposure print. This is due to the fact that the two exposures were clear and sharp and the aperture and exposure time were successful in producing that.The least successful print, was the sandwich print. Next time i would change and adapt the aperture or exposure to get a darker and more prominent print and maybe choose another print that had more noticeable objects. Furthermore, the solarising print wasn't very successful as the solarisation was not very noticeable. To improve this, I could leave it in the developer for less time before re-exposing it.
|
Several successful examples.
Pinhole camera.
In this task I was required to create a pinhole camera which would eventually produce photograms.
A pinhole camera is a container that has been blacken out completely inside except for a small hole that allows light to enter through when desired. They are based off the camera obscura and they are able to capture a fixed image on photographic paper.
A pinhole camera is a container that has been blacken out completely inside except for a small hole that allows light to enter through when desired. They are based off the camera obscura and they are able to capture a fixed image on photographic paper.

|

|

|
To create our pinhole cameras, we used an empty beer can, black card, duct tape and a pin.
- First, we measured out a rectangular piece of card that was 22 centimetres long and about wide.
- Then measure 3.5 centimetres of the width and draw a line across. Here you will make 1cm wide slits from the top of the rectangle to the 3.5cm line.
- Place your beer can over another piece of card and trace around the can lid and cut the circle out.
- Use a can opener to remove the lid and then empty and dry out the insides of the beer can.
- Wrap the card around the beer can.
- Place the circle on top of the slits that you’ve folded inwards, over the lid. Tape it all together securely with duct tape.
- Make a small hole in the front of the can, about halfway down.
- Cover the hole with electrical tape.


I found that taking photos with the pinhole camera in the shade had the best outcomes and create the clearest photograms with the correct contrast to see details. It took a few goes to find the correct lighting and exposure time and the best combination of the both, however after many trails i concluded that three seconds in more shady areas and 1.5-2 seconds more exposed to direct light. I think my most successful photogram was the photogram taken of out the window as it shows the most detail and shows the biggest variation of shades of light and dark. To improve, next time i would assure that the camera is as still as possible and correctly assess the lighting with the exposure tike needed.
Ben Nathan

|
Ben Nathan experiments with different types of media, including painting, photography, film and sculpture. His work reflects on the way of life of the city and its industry, documenting the evolution of urban change. In 2020, Ben established Pinhole London, a diverse community art project that programmes workshops, events and exhibitions with a focus on championing analogue photography. I admire this concept of art as it is showing such a raw and natural side of society. It incorporates people that go about their everyday life and captures a their candid state. Furthermore, it not only shows the subjects in a natural form, but it produces the photos in one of the most fundamental forms of photography made using everyday objects (a beer can). The concept of simplicity is what makes it so interesting. |
Documenting an SLR.
|
SLR stands for Single Lens Reflex. This is a camera that uses a mirror and prism-like system that allows the photographer to view the exact image that they are about to photograph. The light from the image you are capturing enters the lens before bouncing off an angled mirror and hits a pentaprism, directing the light to the viewfinder. Once the image is ready to be captures, the mirror retracts and the light is projected directly onto the recording medium. Finally, you have your undeveloped photo.
|

|
The Exposure Triangle.
Exposure is the amount of light that reaches your camera's sensor, creating visual data over a period of time.
|
Aperture. The aperture controls how much light enters the camera. This is controlled by the opening and closing of the lens's diaphragm by which light enters. Lower f/stops give more exposure because they represent the larger apertures, while the higher f/stops give less exposure because they represent smaller apertures. |

|
Shutter speed. The shutter speed controls the time and how long film is exposed for. A fast shutter speed creates a shorter exposure, while a slow shutter speed gives the photographer a longer exposure. |
|
ISO
The ISO is how sensitive the film is. For example, 100 ISO would be not very sensitive and slower whereas 3200 would be very sensitive and faster, This would be used for photos taken at night. |
How to develop your photos.
|
After shooting your photos, the first step to developing your photos is reeling your film back into the canister before opening up the camera and removing it. The next steps require you to be in the loading room. Once you're in the loading room, you need to:
|


|
Contact sheet. |
A contact sheet is a positive print of all the total negatives from a roll of film. The purpose of the contact sheet was to develop all your images to see which ones were he most successful to enlarge and develop. To create a contact sheet you need to cut your strip of film into sets of six photos. These are then arranged on some photographic paper and underneath an enlarger. A glass sheet is placed over the top to make sure that they are set in place before exposing them. The developing process takes place and then you are left with a contact sheet. After you have chosen the image you would like to enlarge, you need to make a strip sheet to test for the best exposure and aperture. I found that the best aperture for my image was two apertures down from the maximum and exposing it for three seconds.

|

|

|
The intention of this task was to try out the SLR camera by capturing a range of different photos. We had to take 24 photos which included images with motion, portraits and long distance photos. We experimented with the aperture and shutter speed to see which ones would produce the best and most successful images. |

Evaluation.
The project aim was to create photographs from an SLR camera for the first time. This required us to get to know the camera and the developing process as well as all the instruments that are a part of the process. This project was very interesting and enjoyable as we don't get to understand and be a part of the process that goes into taking a photograph as we have phones and advanced technology like printers and computers that allow the process to be done automatically at the click of a button. Although this process is quicker and easier, it takes away the understanding and the creative process. I found that the most interesting part of the project was developing the film because, if it is a successful print, you feel a sense of delight and gratification after seeing what you have created after the long process. Despite having developed photos before this in previous projects at the start of the course, the technique of loading your film into the tank in the darkroom was a new experience which was challenging as you have to know the order and the identify instruments used in the pitch black. I feel that my final print was quite successful, however, next time I should use the same photographic paper as my initial test strip to get the best result. I should also spend more time focusing the image to get a clearer and sharper result.
Foundation Assessment
Thorough presentation throughout. Strong examples of each technique and clear annotation of processes. well done!
Thorough presentation throughout. Strong examples of each technique and clear annotation of processes. well done!
